To Bondo a weld, clean the area thoroughly and apply the Bondo filler in thin layers, waiting for each layer to dry before sanding and applying the next. Bonding a weld is an essential process in automotive body repair to restore the shape and strength of the metal.
How to Bondo a Weld
Bondo is a brand name that has come to refer to a type of polyester resin-based filler material used to repair damaged body panels. Applying Bondo is an affordable and relatively simple process for do-it-yourselfers with access to basic tools and materials.
It involves filling the damaged area with the bondo filler and shaping it to match the body lines. With the help of proper mixing, applying, and sanding, you can quickly achieve a smooth and seamless surface. In this article, we will explain in detail how to bondo a weld to repair and refinish automotive body panels with ease.
Preparing For Bondo
Before starting to apply bondo to a weld, prepare yourself with proper personal protective equipment such as gloves, goggles, and a respirator. Once you have donned this gear, clean the welded area thoroughly to remove any dirt or grime that may interfere with the bondo application process.
Sand and grind the area until the surface is rough, with no smooth spots. This will help bondo to adhere better to the welded area. Remember to follow all safety guidelines and instructions while working with bondo.
Applying The Bondo
To bondo a weld, first mix the bondo in the right proportions. Using bondo application tools, fill the area with bondo.
Sanding And Smoothing
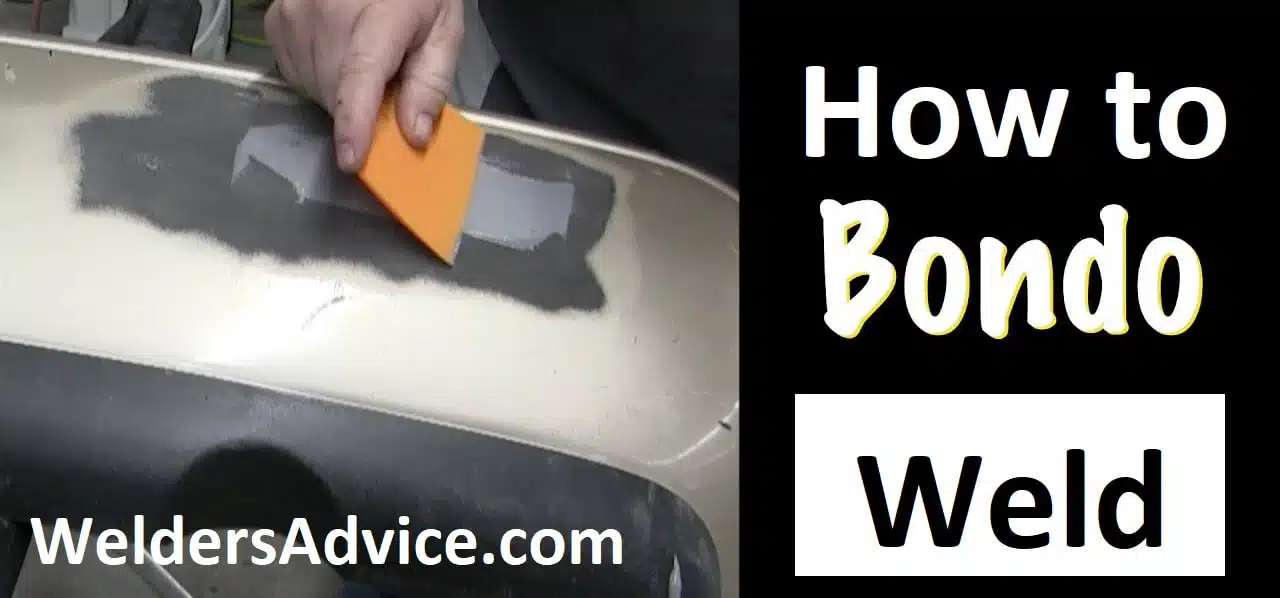
After the bondo has completely hardened, sanding is important to ensure a smooth surface. Use a fine grit sandpaper and lightly sand the bondo. The goal is to level the bondo with the surrounding area. Next, use a putty knife to apply a thin layer of additional bondo if needed.
Smooth out the area with the putty knife and allow it to dry completely before sanding again. Repeat this process until you have achieved a smooth and even surface. Be sure to wipe away any dust before painting or further work.
Painting The Area
Before painting the area where bondo was applied, it’s important to prepare the surface. Sand the area to create a smooth, even surface. Use a primer coat to ensure that the paint adheres properly to the bondo. Once the primer dries, apply the paint in thin, even coats.
Blend the painted area in with the rest of the surface to achieve a seamless finish. Take your time and be patient with the painting process, as rushing can cause imperfections. Following these steps will result in a successful bondo repair that seamlessly blends in with the rest of the surface.
Tips And Tricks
When it comes to bondo a weld, it’s important to know a few tips and tricks to ensure a long-lasting job. One of the most common mistakes is failing to prep the area properly before applying the bondo. Make sure to clean and sand the area first.
Another mistake is applying too thick of a layer, which can cause cracking. Apply thin layers and build up as needed. Bondo can also be used for other welding repairs, such as filling in holes and cracks. Remember to always read the instructions carefully and use caution when handling the product.
With these tips and tricks, you’ll be able to bondo a weld like a pro.
What Surfaces Can Be Bondo-Ed?
Bondo can be used on metal, wood, and plastic surfaces. It is commonly used for automotive body repairs, but can also be used for fixing household items like furniture and appliances.
Can You Bondo Over A Weld?
Yes, you can use bondo to fill and smooth out a weld. However, it’s important to clean and prep the surface properly before applying the bondo to ensure a strong bond.
How Long Does It Take For Bondo To Dry?
Bondo typically dries within 20-30 minutes, but the drying time can vary depending on the temperature and humidity of the environment. It’s important to follow the manufacturer’s instructions for the specific product being used.
Can Bondo Be Sanded?
Yes, once the Bondo has fully cured, it can be sanded and shaped to match the surrounding surface. Fine-grit sandpaper is recommended, and it’s important to wear a mask and eye protection while sanding.
Final Thoughts on Bondo a Weld
Bondo is an excellent solution for bonding welds and filling gaps or holes on metal surfaces. It is easy to use and a cost-effective way to maintain an aesthetically pleasing look for your vehicle or any metal object. When using bondo, it is essential to follow the correct procedure to ensure efficient adhesion, filling, and sanding.
Your bondo layer shouldn’t exceed 1/4 inch to avoid any cracks, and it is essential to sand the surface thoroughly before painting. Applying a primer and a topcoat after sanding ensures a smooth and polished finish. Mastering the perfect bondo adhesion takes time and practice, but with the appropriate technique, you can bond your metal surfaces seamlessly and make it look like you’ve never had any welding repairs.
So next time you have any welding repairs that need bondo, follow this guide, and you’ll get the perfect bondo finish.